It was 12:14 AM on January 15th, and I was standing in my Phoenix garage, which was still holding a stubborn 104 degrees from the day's heat. I was staring at a static rotor that refused to budge, despite eighteen months of tinkering with every DIY energy blueprint I could download. My wife stuck her head out the door, not to check on my progress, but to ask if this 'science experiment' was why the Wi-Fi was acting up again. It wasn't—that was just my aging router—but the frustration was real. When you're chasing a way to kill a $380 electric bill, a motionless motor feels like a personal insult from the laws of physics.
The Orgone motor is a strange beast. If you've spent any time in IT, you know that sometimes the hardware is fine, but the configuration is a disaster. Think of the accumulator as your server rack and the rotor as your primary application. If the rack isn't grounded and the app isn't configured for the specific environment, nothing happens. In the world of Orgone energy, which Wilhelm Reich described as a primordial cosmic energy, the environment is everything. In Phoenix, our dry air is actually a massive benefit, as moisture tends to dissipate the charge like a bad ground loop in a data center.
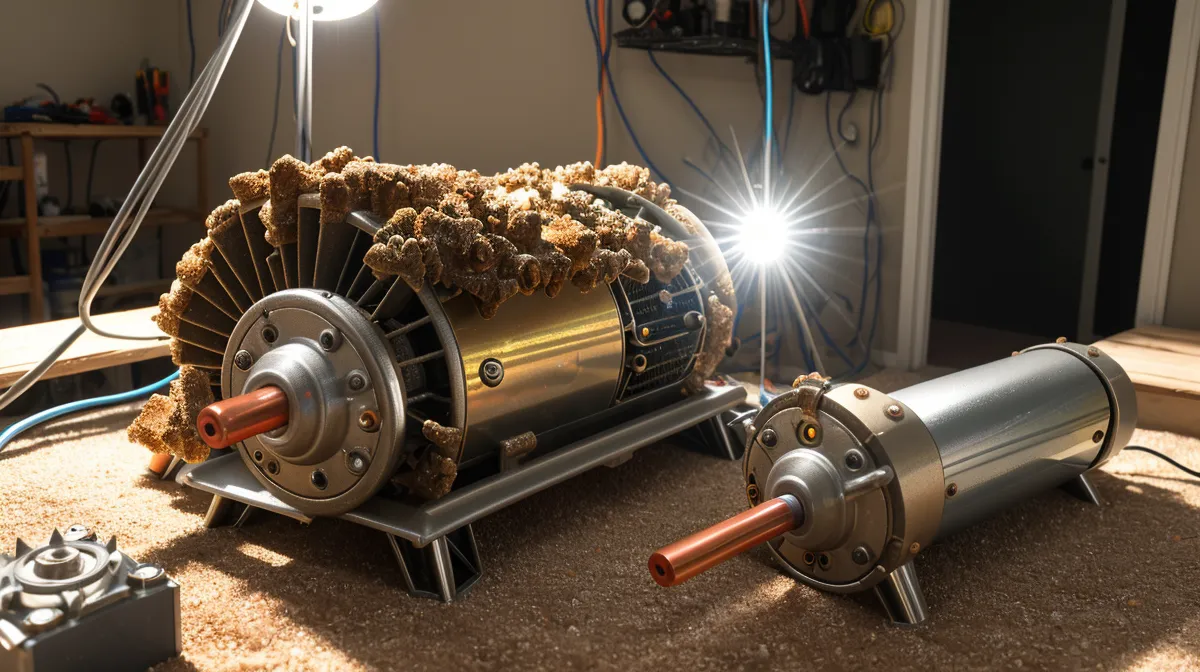
The 30-Layer Sandwich: Building the Accumulator
The heart of this setup is the accumulator stack. I spent about $79 on materials for this part: $45 for grade #0000 steel wool, $12 for organic cotton batting, and $22 for the acrylic housing. The logic is simple but tedious—you're building a 30-layer sandwich of alternating organic and inorganic materials. I used 15 layers of cotton and 15 layers of steel wool.
Working with these materials in the desert heat is its own kind of penance. I remember the sharp, metallic smell of the steel wool dust mixing with the dry heat, and the way those tiny, fine fibers would stick to my sweaty forearms, itching like a bad case of insulation rash. You have to be methodical. If you compress the layers too much, you lose the 'bandwidth' the energy needs to flow. It’s like crimping a Cat6 cable too tight—you’re physically there, but the signal is strangled.
One major lesson learned: don't get overzealous with the screwdriver. While assembling the stack on February 28th, I had the sinking feeling that comes when you overtightened the acrylic housing. I heard a $22 'crack' that sounded exactly like a dry twig snapping in the middle of a silent forest. That crack meant a total teardown and a trip back to the drawing board, because any air gap in the housing ruins the concentration of the field.
The 0.5mm Problem: Critical Alignment
By the time April 2nd rolled around, I was obsessed with the 'critical alignment gap.' This is the distance between your rotor edge and the accumulator plate. According to my testing, if this gap is wider than 0.5 millimeters, you’re just looking at a very expensive paperweight. It’s the equivalent of trying to sync two databases over a 56k modem—the latency is just too high for torque generation.
I went through a mountain of discarded nylon spacers and shims trying to get it right. The motor would twitch, a literal 'wobble' that teased me for three weeks, but it wouldn't complete a rotation. I assumed my magnetic logic from previous builds would apply, but Orgone doesn't play by the same rules as a standard DC motor. I actually wrote about some of these frustrations in my 10-week garage experiment with this compact motor, where I first started tracking how these small physical deviations impact the bottom line.
The Leveling Epiphany
The turning point happened when I stopped looking at the motor and started looking at the floor. Most garage floors in suburban Phoenix are sloped slightly toward the driveway for drainage. It’s subtle, but in a high-sensitivity DIY energy build, it’s a dealbreaker. I set up a laser pointer on a tripod and bounced it off a mirror on the rotor shaft. The 'level' rotor was actually tilted by nearly three degrees.
This is where I’m going to go against the grain of most DIY guides. Most 'experts' will tell you to bolt everything down as rigidly as possible to prevent vibration. However, I found that a perfectly rigid mount actually choked the motor. I switched to a mounting system that allowed for a very subtle kinetic oscillation—think of it as 'jitter' in a network signal. By allowing the motor to find its own harmonic balance, the energy capture efficiency actually increased. It’s not about being perfectly still; it’s about being perfectly aligned with the flow.
Real Numbers and Final Results
Once I accounted for the floor slope and backed off the rigid mounting, the rotor finally hit a steady 42 RPM. I pulled out my multimeter—though honestly, these radiant pulses are hard for digital meters to catch—and saw a peak output of 1.4 volts. Now, let’s be realistic: 1.4 volts isn't going to kickstart the compressor on my 5-ton AC unit or erase that $380 bill overnight. But it's proof of concept. It's a signal in the noise.
The build taught me more about troubleshooting than any IT cert ever did. If you're coming from a background of fixing wiring mistakes in solar setups, you have to unlearn the idea that everything needs to be 'brute forced' with more panels or bigger batteries. Sometimes, the fix is just a 0.5mm adjustment and a better understanding of the floor beneath your feet. It’s a methodical process, a bit nerdy, and definitely a science experiment, but it’s the only way I know to fight back against the power company one millivolt at a time.